How to add SwiftUI to a UIKit project

iOS Developer at Hepsiburada
The UIKit framework was introduced by Apple in 2008 along with iPhone OS2. More than 10 years later, in 2019, Apple introduced SwiftUI with the intent of saving developers time.
The SwiftUI framework supports declarative programming, meaning it requires less code. In addition, it easily manages themes, offers a live preview, uses Canvas instead of Interface Builder, and is less prone to crashing.
So, SwiftUI vs. UIKit — is one better than the other? Well, despite its many advantages, companies have been slow to adopt the use of SwiftUI in their iOS apps. Some organizations are willing to try SwiftUI for a new project, but many are hesitant to migrate existing UIKit projects to this framework.
SwiftUI requires iOS 13 or later, so it’s not compatible with apps developed using an older iOS version. Also, transferring large apps to a different framework is time consuming and could hamper developer bandwidth.
This tutorial will demonstrate how to add a SwiftUI screen to a UIKit project. This SwiftUI UIKit integration solution can provide the experience of using SwiftUI without creating a new app from scratch. Adding SwiftUI to an existing UIKit project will also make it easier for us to migrate the app to SwiftUI in the future.
Final project: UIKit app with SwiftUI screen
Here’s the final version of the app that we’ll build in this tutorial:
We’ll create a SwiftUI screen within a UIKit app, and then add functionality to allow navigation between the SwiftUI screen and the UIKit screen.
Creating the iOS project with Storyboard interface
Let’s start by creating the UIKit project.
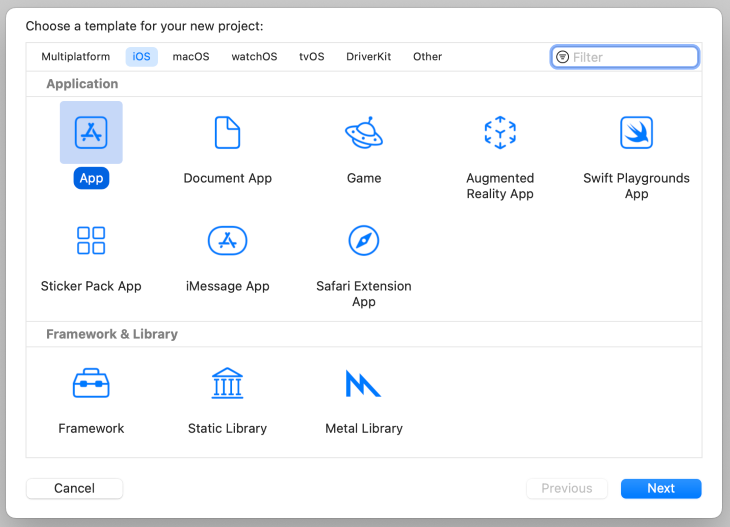
First, we’ll select App from the iOS tab:
Then, we’ll select Storyboard from the Interface dropdown:

For this tutorial, I‘ll remove Storyboard and will build the app’s UI programmatically. Here’s an article that you may find helpful for learning more about creating an iOS app’s UI with Storyboard vs. programmatically.
Check this GitHub commit to get the changes necessary to remove Storyboard from your sample project and specify the navigation controller as a root view controller.
Creating the SwiftUI screen
Now, let’s create a SwiftUI View file.
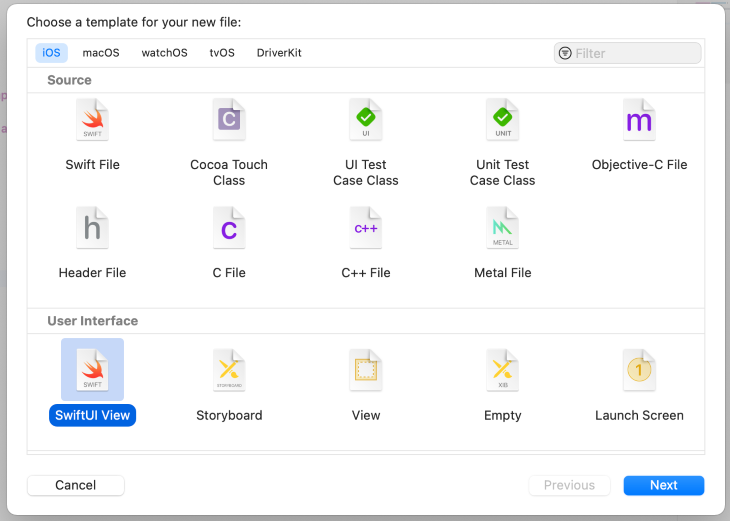
Create a new file in SwiftUI. Select iOS for the platform and SwiftUI View for the user interface:
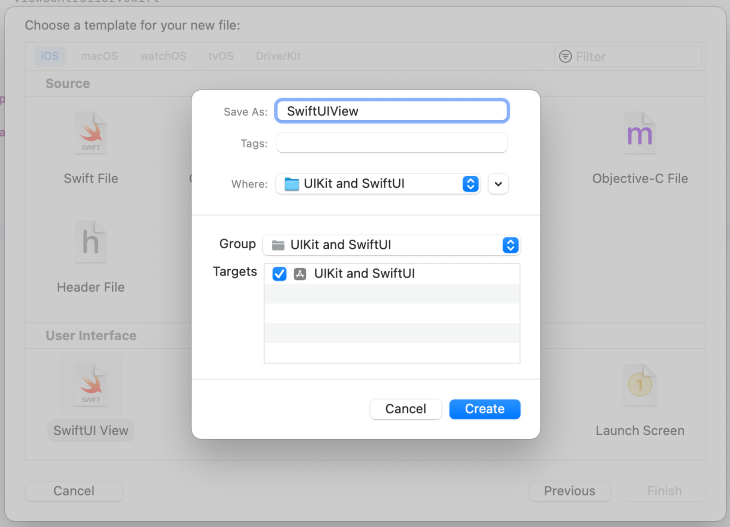
Next, give the file a name, and click Create:
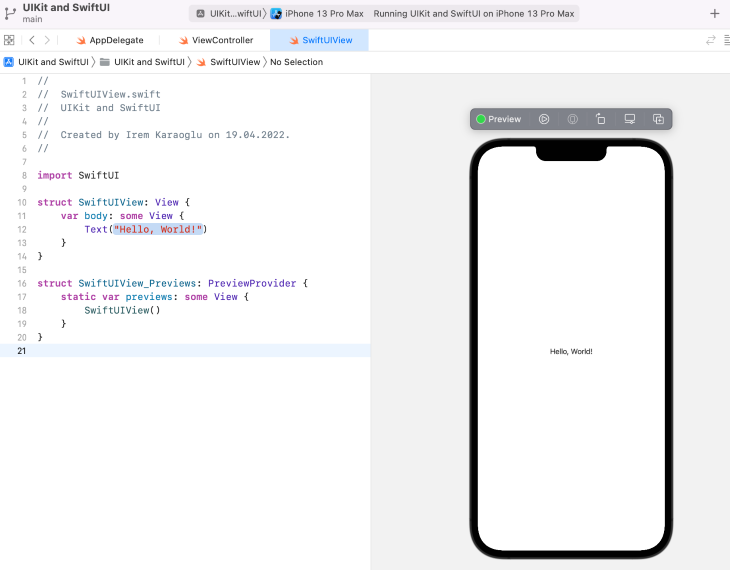
Now, you should see the default SwiftUI View file with text “Hello, World!”
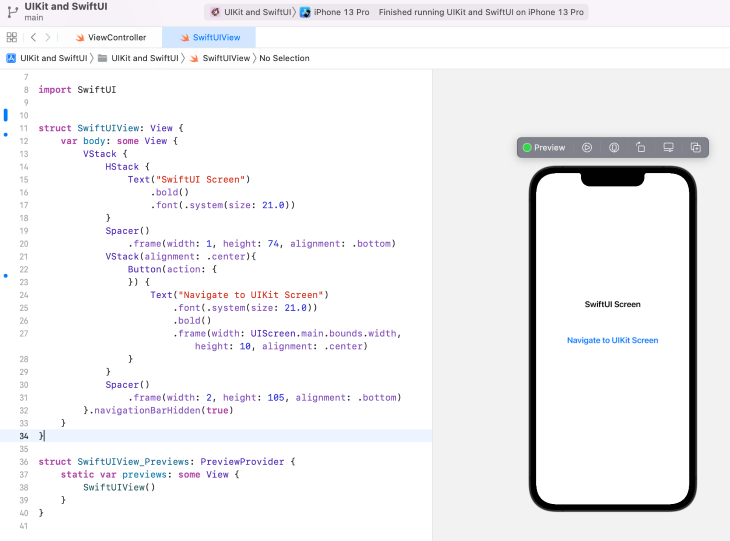
Next, let’s add a simple UI design consisting of some text and a button:
struct SwiftUIView: View {
    var body: some View {
        VStack {
            HStack {
                Text("SwiftUI Screen")
                    .bold()
                    .font(.system(size: 21.0))
            }
            Spacer()
                .frame(width: 1, height: 74, alignment: .bottom)
            VStack(alignment: .center){
                Button(action: {
                }) {
                    Text("Navigate to UIKit Screen")
                        .font(.system(size: 21.0))
                        .bold()
                        .frame(width: UIScreen.main.bounds.width, height: 10, alignment: .center)
                }
            }
            Spacer()
                .frame(width: 2, height: 105, alignment: .bottom)
        }.navigationBarHidden(true)
    }
}
After updating the SwiftUI screen, we can see the live preview on the canvas. Our new SwiftUI screen has a label, SwiftUI Screen, and a button to navigate to the UIKit screen.
Creating the UIKit view
Now, let’s work with the UIKit’s ViewController to create a basic user interface. It will include a label with text “UIKit screen” and a button to navigate to the SwiftUI screen.
override func viewDidLoad() {
        super.viewDidLoad()

        view.backgroundColor = .white

        let label = UILabel()
        label.text = "UIKit Screen"
        label.textColor = .black
        label.translatesAutoresizingMaskIntoConstraints = false
        label.font = .boldSystemFont(ofSize: 21)
        view.addSubview(label)

        let button = UIButton()
        button.setTitleColor(.blue, for: .normal)
        button.setTitle("Navigate to SwiftUI Screen", for: .normal)
        button.titleLabel?.textAlignment = .center
        button.translatesAutoresizingMaskIntoConstraints = false
        button.addTarget(self, action: #selector(openSwiftUIScreen), for: .touchUpInside)
        button.titleLabel?.font = .boldSystemFont(ofSize: 21)
        view.addSubview(button)

        NSLayoutConstraint.activate(\[
            button.centerXAnchor.constraint(equalTo: view.centerXAnchor),
            label.centerXAnchor.constraint(equalTo: view.centerXAnchor),
            button.centerYAnchor.constraint(equalTo: view.centerYAnchor),
            button.topAnchor.constraint(equalTo: label.bottomAnchor, constant: 64)\])
    }
Displaying the SwiftUI screen
We need a way to present our SwiftUI screen. Right now, our application opens with the UIKit screen but doesn’t navigate to the SwiftUI screen.
To set up the functionality to navigate between the UIKit screen and the SwiftUI screen, we’ll use the UIKit’s UIHostingController class. The UIHostingController is a UIKit view controller that manages a SwiftUI view hierarchy.
To create UIHostingController, ensure that you import SwiftUI at the top of the code module.
Now, let’s open the ViewController.swift file and create a function to navigate to the SwiftUI screen:
@objc func openSwiftUIScreen() {
        let swiftUIViewController = UIHostingController(rootView: SwiftUIView())
        self.navigationController?.pushViewController(swiftUIViewController, animated: true)
    }
Inside this function, we create a UIHostingController by passing our SwiftUI screen as a root view and also passing the main navigation controller to that. UIHostingController is a UIKit view controller and we push that view controller to our navigation controller.
Next, we need to add a target for our button to fire the openSwiftUIScreen function:
button.addTarget(self, action: #selector(openSwiftUIScreen), for: .touchUpInside)
Now, we can navigate from the UIKit screen like in the demo below. Notice that we’re not able to go back from the SwiftUI screen. This is because we didn’t give any action to our button.
To go back from the SwiftUI screen, we need to add a UINavigationController and pass our root navigation controller to the SwiftUI screen.
We pushed to the SwiftUI screen before using the UIHostingController. Now, we will use the UINavigationController to pop back to the UIKit screen.
struct SwiftUIView: View {

    weak var navigationController: UINavigationController?

    var body: some View {
        VStack {
            HStack {
                Text("SwiftUI Screen")
                    .bold()
                    .font(.system(size: 21.0))
            }
            Spacer()
                .frame(width: 1, height: 74, alignment: .bottom)
            VStack(alignment: .center){
                Button(action: {
                    navigationController?.popViewController(animated: true)
                }) {
                    Text("Navigate to UIKit Screen")
                        .font(.system(size: 21.0))
                        .bold()
                        .frame(width: UIScreen.main.bounds.width, height: 10, alignment: .center)
                }
            }
            Spacer()
                .frame(width: 2, height: 105, alignment: .bottom)
        }.navigationBarHidden(true)
    }
}
Next, let’s update our function in ViewController:
@objc func openSwiftUIScreen() {
        let swiftUIViewController = UIHostingController(rootView: SwiftUIView(navigationController: self.navigationController))
        self.navigationController?.pushViewController(swiftUIViewController, animated: true)
    }
With this update, we’re able to navigate from the UIKit screen to the SwiftUI screen and then back to the UIKit screen.
Here’s the final version of our application:
Conclusion
In this article, we demonstrated how to integrate SwiftUI into a UIKit project. The 2021 iOS Developer Community Survey indicated high levels of interest in SwiftUI. Given SwiftUI’s growing popularity among developers but slow adoption rate for organizations, it’s important to understand that it’s possible to use both SwiftUI and UIKit in a single application.
I hope you enjoyed this article. You can share your valuable feedback or questions in the comments section or via hi@iremkaraoglu.com. See you in the next article! Take care!
The post How to add SwiftUI to a UIKit project appeared first on LogRocket Blog.