Creating a bounce effect on Swift with UIBezierPath

iOS Developer at Hepsiburada
Creating aesthetic aspects on a digital product is vital to boost interaction with people. To add amusing features to them, animations or images can be used. We create entertaining and instructive mobile applications for kids at Otsimo, where I work as a mobile application developer. In April 2022, we launched the Sago Mini First Words app, and we continue to add new features every day. Sago Mini First Words helps children say their first words or to make speech improvements. We just introduced a brand-new category called Songs! Compared to other categories, the songs category offers a distinctive experience, and the Songs category is featured on Apple App Store 🚀 The song has lyrics that the child can sing along to. In this article, I am going to show you how to achieve the bounce effect on these lyrics that I used during the implementation of the Songs category. First, let's watch a video from our application to understand what we are going to do throughout this tutorial.
Creating engaging apps is what I do every day. It could be challenging to include amusing components while developing an app. Whenever I manage a complicated design, I use UIBezierPath as a solution. You don't need to worry if you are unsure of what it is. In this article, you will find the answer to UIBezierPath.
To fully describe it for this blog, I made a simple demo application. I won't go through each line step by step. I'll try to give you the idea, but feel free to look through my source code and use this demo program however you like.
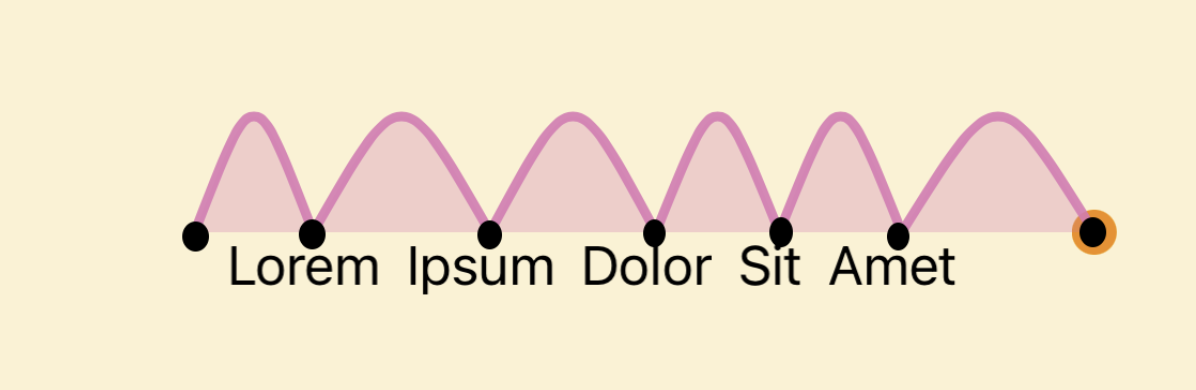
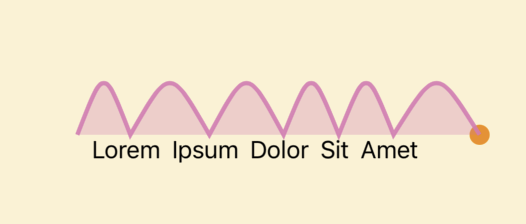
This is how the demo application looks:
To result in the same application, what you need to do is
create separate UILabels
create a ball as UIView
create a path for the ball to travel through
assign animation durations to the spots the ball will bounce on.
I start by including dummy labels like "Lorem Ipsum Dolor Sit Amet." Every word in the sentence is actually a UILabel, and I provide a certain distance between each one. I won't go into these because I want to concentrate on the bounce effect, but you may check the source code as described above.
Then, let's create a ball as a UIView since it will be crucial to our efforts. We will bounce this ball by building a UIBezierPath because it needs a path to travel through; however, we will get to that part of the discussion later.
    func addDot() {
        let ball = UIView()
        ball.layer.cornerRadius = dotSize/2
        ball.backgroundColor = UIColor(red: 242/255, green: 141/255, blue: 10/255, alpha: 1)
        ball.translatesAutoresizingMaskIntoConstraints = false
        view.addSubview(ball)
        self.dot = ball

        NSLayoutConstraint.activate([
            ball.widthAnchor.constraint(equalToConstant: dotSize),
            ball.heightAnchor.constraint(equalToConstant: dotSize),
            ball.leadingAnchor.constraint(equalTo: view.leadingAnchor, constant: initialPoint.x),
            ball.topAnchor.constraint(equalTo: view.topAnchor, constant: initialPoint.y),
        ])
    }
The ball on the screen is made with the code snippet below. Let's go on to the section where the ball should land. I want the ball to bounce at each of the label's middle places in this demo application.
We must calculate the points where the ball bounces in order to understand them. The UILabel's width is returned by the next function, which retrieves a UILabel.
   func findWidthOfEachLabel(label: UILabel) -> CGFloat {
       // returns the width of a given UILabel
       let width = label.text?.size(withAttributes:[.font: label.font as Any]).width ?? 30
       return width
   }
The path must now be drawn. The ball must traverse curves. As a result, we make curves like this:
We use UIBezierPath in order to produce this curve graphic. UIBezierPath is a class by UIKit and Apple’s developer docs put it this way: “UIBezierPath is a path that consists of straight and curved line segments that you can render in your custom views.” We can draw vectors thanks to it. In the below code snippet, we check the labels which we created and we have a starting point for labels. Then, we move the path to the point where we start the path. Since I preferred to observe the ball arrive at the first label—in our case, "Lorem"—from the outside, I made the decision to begin this path before the label.
      func createBezierPath() -> UIBezierPath? {
        guard !labelWidths.isEmpty else { return nil }

        let path = UIBezierPath()
        var point = initialPoint
        point.x = initialPoint.x + labelWidths[0]/2 - 10
        var previousLabelWidth = 10.0
        var deltaX = 0.0

        for index in 0..<labels.count {
            deltaX = (previousLabelWidth  + (space*2) + labelWidths[index])/2

            if index == 0 {
                path.move(to: point)
            }

            let controlPoint1 = CGPoint(x: point.x + deltaX/2,
                                        y: point.y - dotYvalue)
            let controlPoint2 = CGPoint(x: point.x + deltaX/2,
                                        y: point.y - dotYvalue)
            let destination = CGPoint(x: point.x + deltaX,
                                      y: point.y)
            point = destination
            points.append(destination)
            path.addCurve(to: destination, controlPoint1: controlPoint1, controlPoint2: controlPoint2)
            previousLabelWidth = labelWidths[index]
            durations.append(0.3)
        }
        // last bounce
        let controlPoint1 = CGPoint(x:  point.x + lastBounceX/2,
                                    y: point.y - dotYvalue)
        let controlPoint2 = CGPoint(x:  point.x + lastBounceX/2,
                                    y: point.y - dotYvalue)
        let destination = CGPoint(x:  point.x + lastBounceX,
                                  y: point.y)
        point = destination
        points.append(destination)
        path.addCurve(to: destination, controlPoint1: controlPoint1, controlPoint2: controlPoint2)
        durations.append(0.3)

        return path

    }
Now, the path is available but not the animation. We first establish the aforementioned path in order to witness the animation. We construct CAKeyframeAnimation, which is yet another UIKit class that is described as "An object that provides keyframe animation capabilities for a layer object" in the Apple documentation. Our UIBezierPath object's cgPath is passed to the animation's path attribute, and keyTimes is assigned to help determine how long each curve animation will last.
func startDotAnimation() {

        let path = createBezierPath()

        let animation = CAKeyframeAnimation(keyPath: "position")
        animation.path = path?.cgPath

        animation.duration = durations.reduce(0, { partialResult, v in
            partialResult + v
        })

        var cd = 0.0

        let times: [NSNumber] = durations.enumerated().compactMap({ index, duration in
            cd = cd + duration
            let xd = cd - duration*0.5
            return index + 1 == durations.count ? 1.0 : xd / animation.duration as NSNumber
        })

        animation.keyTimes = [0.0] + times
        self.dot?.layer.add(animation, forKey: "bezier")
        self.dot?.alpha = 1
        self.dot?.center = self.points.last!

    }
For each label, I specified values of 0.3 seconds when I wrote the UIBezierPath. You are able to alter it as you work on it. Also, if you would like to see the path you created during your implementation, you may use the following function.
func showPath(_ path: UIBezierPath) {
        let shapeLayer = CAShapeLayer()
        shapeLayer.path = path.cgPath
        shapeLayer.fillColor = UIColor(red: 222/255, green: 120/255, blue: 180/255, alpha: 0.3).cgColor
        shapeLayer.strokeColor = UIColor(red: 222/255, green: 120/255, blue: 180/255, alpha: 0.9).cgColor
        shapeLayer.lineWidth = 3.0
        view.layer.addSublayer(shapeLayer)
    }
This function adds a CAShapeLayer to your screen and shows the path we created. You may call this function inside the startDotAnimation function since we create the path there.
During this article, I tried to give you the general idea of achieving the bounce effect. I hope this article helps you to learn about the animations and the UIBezierPath. You may work on this demo app's source code. Thank you for reading, if you have any feedback you may reach me at the comments below or via hi@iremkaraoglu.com. If you like this article, please add some reaction 🦄 Thank you, see you in the next article!